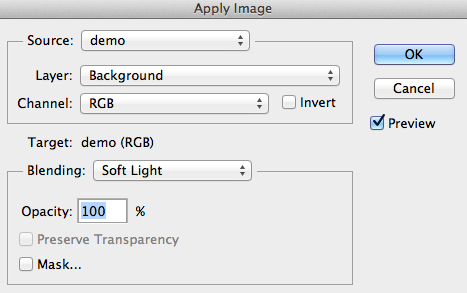
Even the thought of switching a colour of a subject or object can be considered daunting, when in reality it is actually quite a simple process.
You firstly have to ask yourself what do you require?
A Light to Dark conversion or a Dark to Light Conversion of colour
There are typically two variables to consider when switching any colour of any subject/object:
Luminosity & Colour + Suitable Mask of the Area you wish to effect
Once you understand this process, you will be able to perform both conversions.
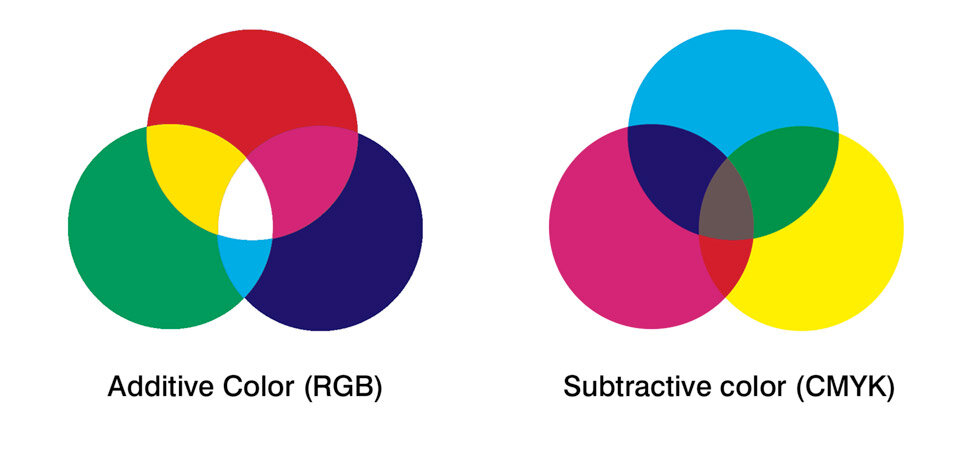
Luminosity Adjustments
In simple terms, any adjustment of luminosity (Exposure, Brightness or Contrast adjustments) through the use of Levels, Curves or Channels to make your image lighter or darker.
A quick way of generating a variety of different options is to use luminosity masks.
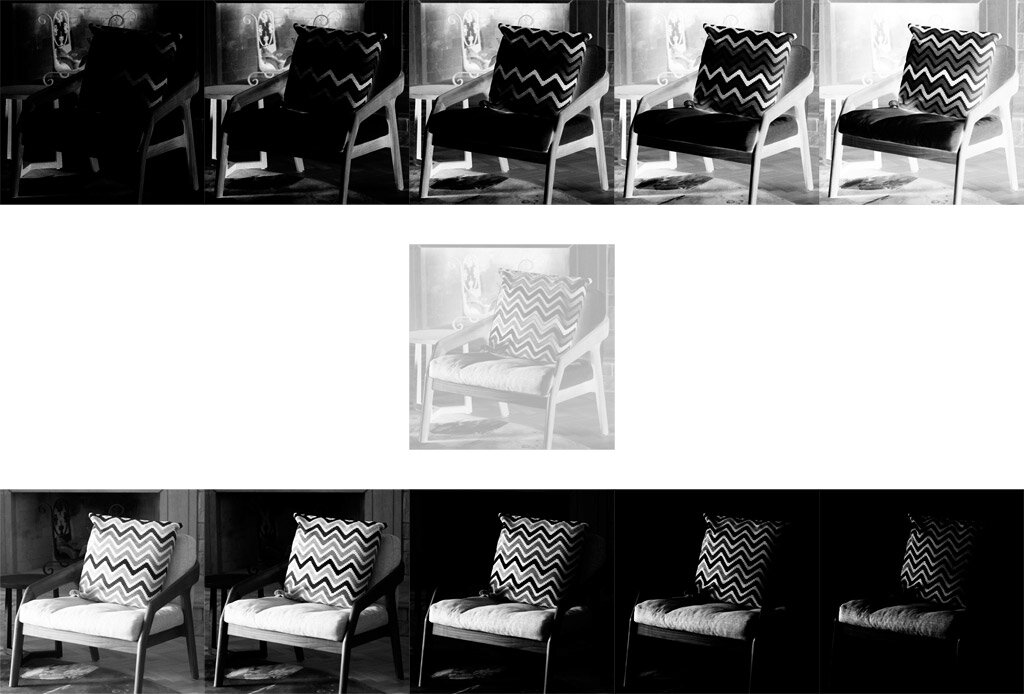
If you are unfamiliar with the use of Luminosity masks, it is simply showing you variables of lightness for Highlights, Midtones and Shadows within your image.
These "masks" can be used on any adjustment and effect your image proportionally.
To load a channel as a selection simply (command or ctrl + click) on the channel you wish to use and then add it as a layer mask to your adjustment.
Please note if you wish to load a selection it will normally be as a positive.
If you require a negative Channel simply invert the selection once it is loaded or or Invert the mask on the adjustment.
I personally use Zone Masks as it shows you a different range of information compared with Channels. Once again these can be used as a mask for any adjustment layer.
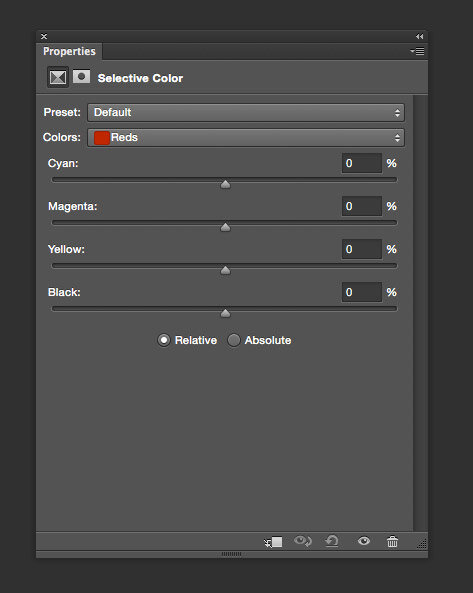
Colour Adjustments
You can choose to use any solid colour adjustment layer or colour swatch.
To tweak the colour I normally use the following adjustments which can be found here
Shortcuts for Selections:
Load any channel as a selection - Command (or CTRL) Click on the Channel/Mask
Inverse any Selection - Command (or CTRL) + Shift + I
Invert any mask - Command (or CTRL) + I
Deselect the selection - Command (or CTRL) + D
Reselect the selection - Command (or CTRL) + Shift + D
Now for the fun...
Select All - Command (or CTRL) + A
Copy - Command (or CTRL) + C
Paste - Command (or CTRL) +V
Load a Channel as a selection - Command (or CTRL) Click on the Channel/Mask
Opening up your selection with itself (making it the Channel brighter) - Shift + Command (Or CTRL) Click
Closing down your selection with itself (making it the channel darker) - Shift + Option (or ALT) + Command (Or CTRL) Click
Intersecting your selection with itself - Option (or ALT) + Command (Or CTRL) Click
Instructions:
•On your image
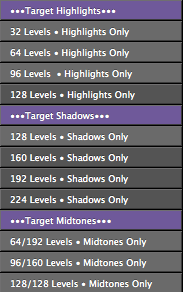
•Load your zone masks using the action above
• Invert zones 0-4 so that they are now positive
• Start with Zone 6 as it will likely be your base, copy this to its own layer
•Depending on how dark or light you need to switch, choose the appropriate zone mask
• Select an appropriate colour you wish to use; set the layer to color blending mode
• Group these two layers (colour and luminosity) in their own group and apply a mask to the area you wish to effect.
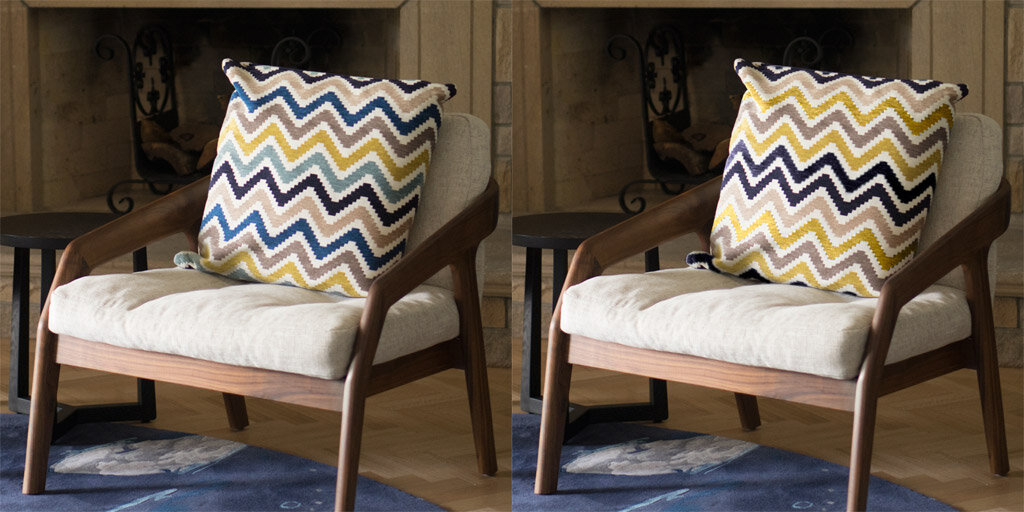
Practice:
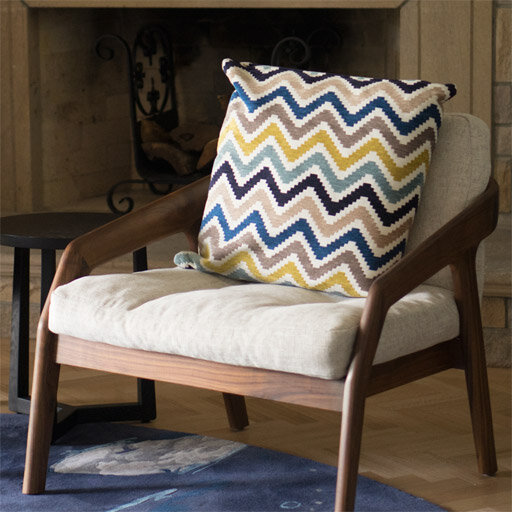
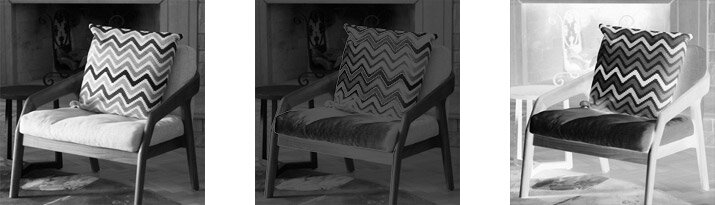
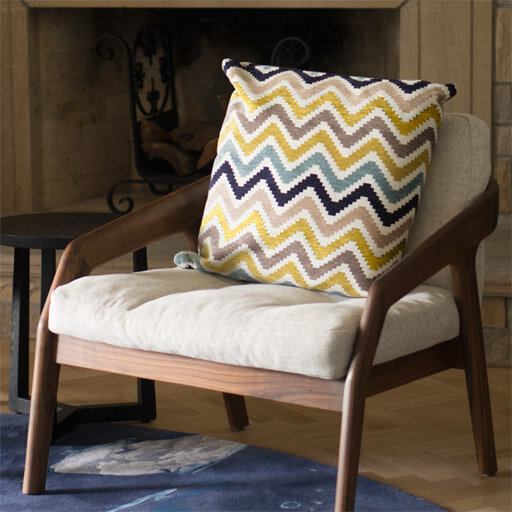
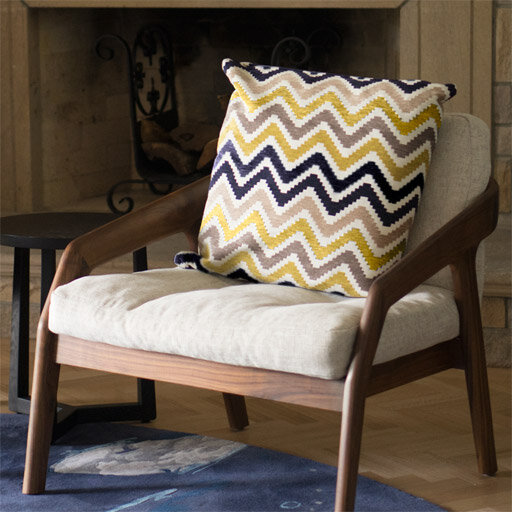
Original image
1. Selected the appropriate luminosity Mask for switching the Royal Blue to the yellow.
As the luminosity of the blue needs to be lighter. A lighter zone is chosen of +2
2. Sampled the colour of the yellow

3. Created a mask where it is required
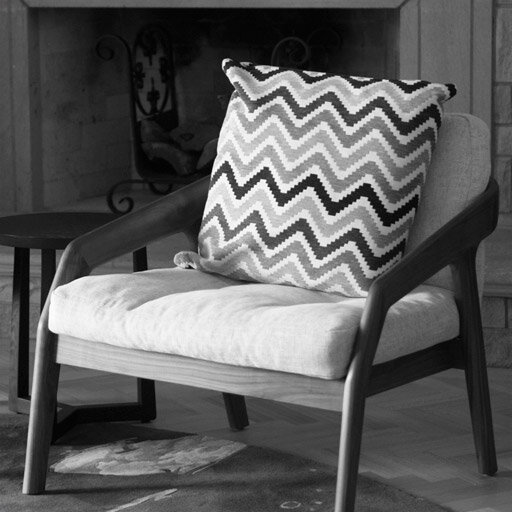
1st Conversion - Dark to light Result
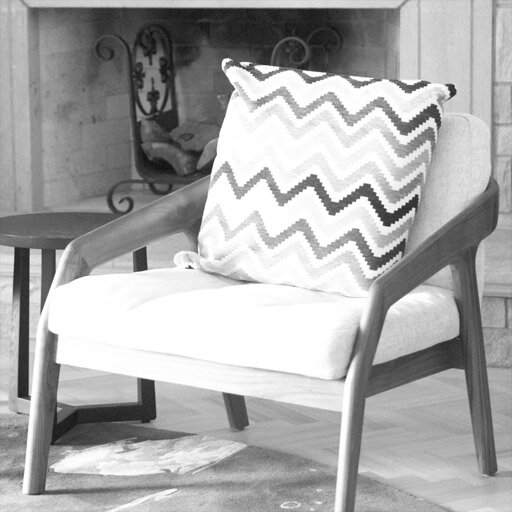
4. As the final luminosity is darker for the colour switch (Light blue to Purple).
I simply selected the default Zone 0 and applied a levels adjustment to this adjustment.
5 . Purple colour Sample
6. Select the final mask
2nd Conversion - Light to Dark

Before/After